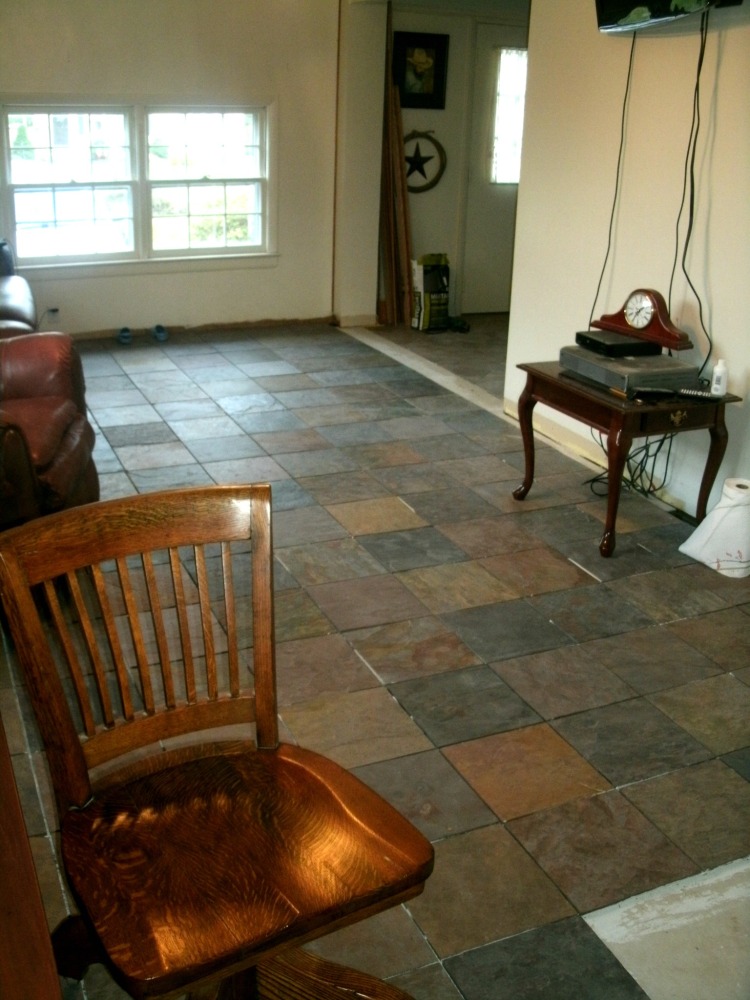
The floor is almost finished, yahoo! If you have been following along you already know about our remodel and the adventure we are having working with the Barnwood Builders and their TV show. If not take a look at where this mess all started and here is the idea we have for the future. The slate tile floor is about finished and the repaired ceiling is looking better than ever. It has taken about a month of weekends to get this far and we need about two more real good days to finish up the last couple boxes of tile and get about 10 cut and set in the hard to reach areas. Then grout will be the final step. I am not looking forward to spending 8 hours on my hands and knees trying to get grout to set up in between all this tile.

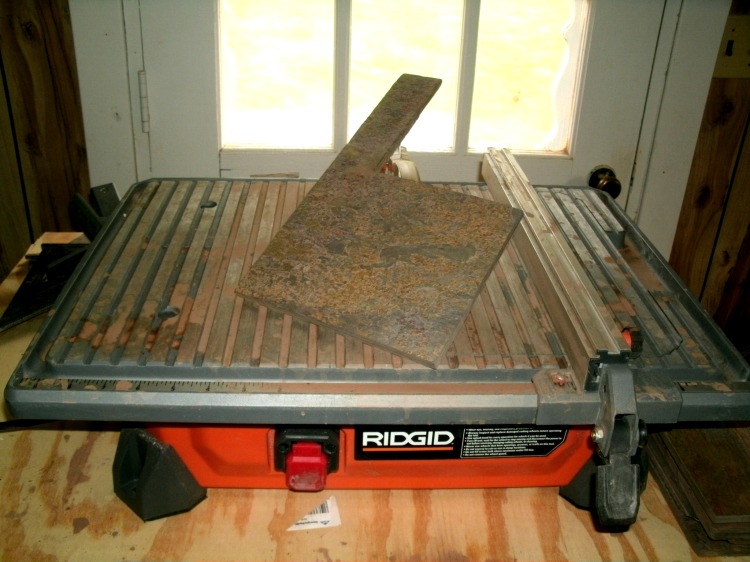
One of the unexpected things we have learned is that you need a tile saw, even if you do not buy one and only rent one they are wonderful and save you hours of work and worry when dealing with slate. Slate is layers and layers of sediment pressed together over thousands of years making it flaky and brittle and it is not as stable as ceramic tile. We tried several ways to cut the tile before finding that with delicate stone a tile saw saves you hours of headaches. Tom and I bought this portable one from E-Bay. This is what the company does best, selling used equipment that is still in great shape but not new! Tom and I found this same saw at Home Depot listed for $ 235.00 we bought this used one that was complete in the box with all the paper work and blade for $ 106.00 including shipping. We will use the saw at least 10 times this coming week and again when we redo our bathroom and kitchen making this a wise 100 dollar investment. Tom just set the saw on a piece of plywood over two saw horses as our work area. As shown the saw did a wonderful job of cutting a hard to fit piece of tile for the cross over between the family room and entry areas.
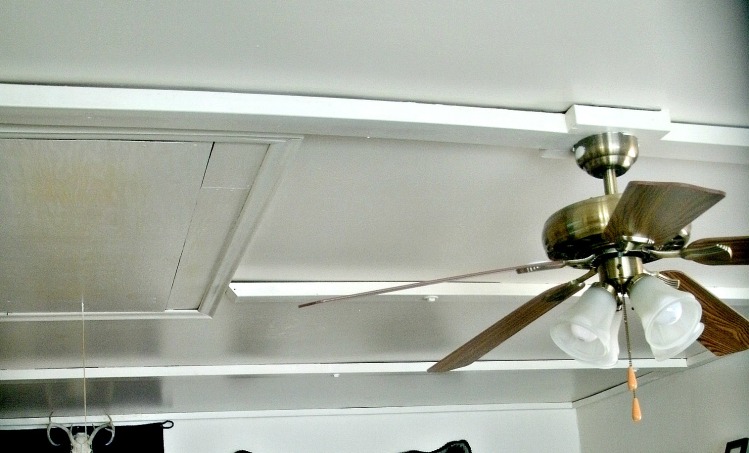
Then while Tom was at work my oldest son Cody came over to help with finishing up the mud and tape that we added to the old ceiling. The old ceiling looked like this and was in rough shape. The 4 x 4 trim across the ceiling was loose and pulling away from the drywall in places and the lag bolts that you see are not hooked to anything and are not holding the ceiling up. The trim around the room was 2 x 2’s and did not fit well at the corners. All the trim just needed removed and the ceiling just needed a traditional finish.
So in the process of removing all of this from the ceiling we also removed a sheet of paneling from one wall. The paneling made the wall surface uneven and lumpy. It was white so you would not have noticed it until the barn wood was up and the boards were uneven. So here is what we found under the paneling.
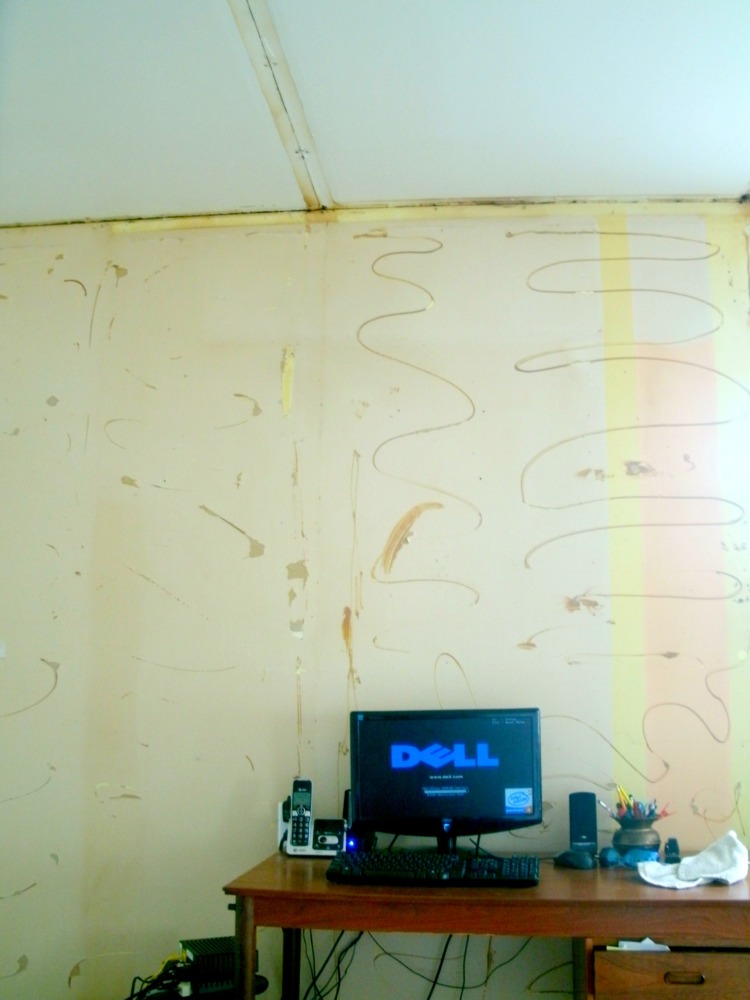
For a couple of days Cody and I worked on taping the ceiling, sanding and painting. The amount of glue you see on the wall is not bad so the paneling came down without ripping any huge holes in the walls. We did fill in some nail holes but over all the wall would just be painted white again and covered with barn wood to give it a uniform appearance.

Then a fun photo of Christopher and I after sanding the ceiling and getting ready for paint.

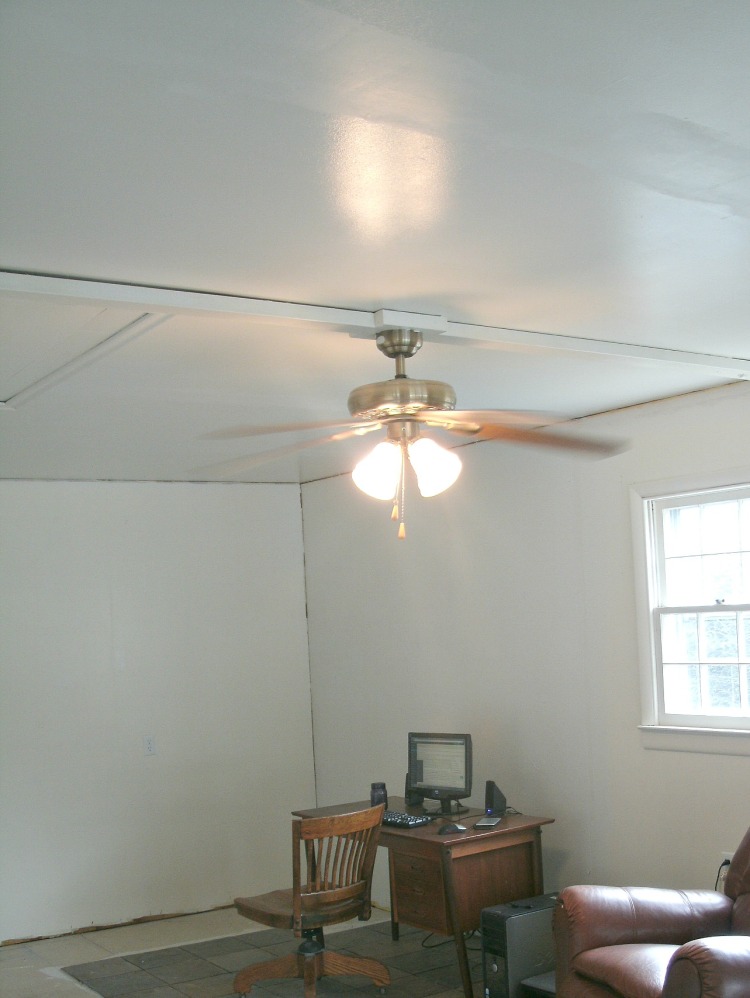
The with two coats of paint on the wall and ceiling we are only left with removing the single board that holds my light fixture/fan up. This board has my only light source attached to it so I am guessing that it will be in place for a long time.
Tom and I are so happy with the over all appearance of the floor that I am sure we will be doing this flooring in the kitchen in the future. It may take a little more time then rolling out linoleum but the results will last a life time and are so much nicer in quality. I just can’t wait to see it polished.
In the next couple of days I will likely be moaning that my hands and knees hurt from crawling around getting the grout cleaned off and the floors polished. I will complain that my mother’s day is at a restaurant instead of at our house because the kids can not play on wet grout. I will fall in to bed that night knowing I have just created not only a lovely home but wonderful memories for my kids.

This is looking very nice JoLynn. I agree that the tile saw is essential. I bought a small unit (under $100) when I had to put ceramic tile behind our wood stove because the cut tiles were going to end up being the most visible. Grout is the worst part of any tile job. I don’t think I hate home improvement task as much I hate grouting tile. Keep up the good work, you guys are doing a great job.
LikeLiked by 1 person
Dan we did buy grout bags and that is suppose to help keep the slate tiles clean… have you used them? My friend who is a contractor says they are worth every penny…. so I got my knee pads ready and some heavy duty rubber gloves ready for the weekend
LikeLiked by 1 person
I haven’t tried them. I wasn’t sure I could get the same shape to the grout line (slightly convex) without going over it with a float. The tiles behind the stove were the worst because they are black and the grout keeps drying to a light gray haze – it took forever.
LikeLike
I am thinking that our grout will eventually be concave..we are suppose to add the grout and run a finger through it to make sure it is seated deeply and this should remove any extra grout …. but who know what will happen when I am actually doing it?
LikeLike
Can’t wait to see the,finished room. It must be a great feeling seeing what you’ve accomplished. Really like,the floor colors.
LikeLike
I love to work on houses… next to reading I think it is my favorite hobby. I know that this will be the last large thing we do to the house this year and next is about getting some of the outside stuff done. I really do enjoy see what we have done.
LikeLike
what a really great job all of you have done with the renovation work. your pictures prove it!
LikeLike
Thanks so much Eddie… this has been a real adventure and we are learning so much this weekend we start to form a plan on what and how we want to use the barn lumber. I will post some more photos soon.
LikeLiked by 1 person
Nice ceiling with beautiful colour :)). Also thanks for your guide !
LikeLiked by 1 person